> ## Documentation Index
> Fetch the complete documentation index at: https://developers.fibery.com/llms.txt
> Use this file to discover all available pages before exploring further.
# Connecting to Fibery MCP
> Connect the Fibery MCP Server to Claude, ChatGPT, and other AI clients.
Fibery MCP server should work in any MCP Client.
### Claude (Desktop / Web)
1. Navigate to **Settings → Connectors → Add custom connector** (available for paid plans)
2. Fill in the connector details and submit:
* **Name**: `Fibery`
* **URL**: `https://mcp.fibery.io/mcp`
3. After adding the connector, Claude will automatically initiate the OAuth 2.0 authentication process (no API tokens needed). If no luck, click the Connect button for the Fibery tool and try again.
### ChatGPT
1. Navigate to **Settings → Connectors → Advanced Settings**
2. Enable "Developer mode" to allow MCP servers with any set of tools
3. Navigate back to **Settings → Connectors** and hit "Create" in the top right corner
4. Fill in the connector details and submit:
* **Name**: `Fibery`
* **MCP Server URL**: `https://mcp.fibery.io/mcp`
5. After adding the connector, OpenAI will automatically initiate the OAuth 2.0 authentication process (no API tokens needed). If no luck, click the Connect button for the Fibery tool and try again.
### Le Chat
1. Go to **Intelligence → Connectors**
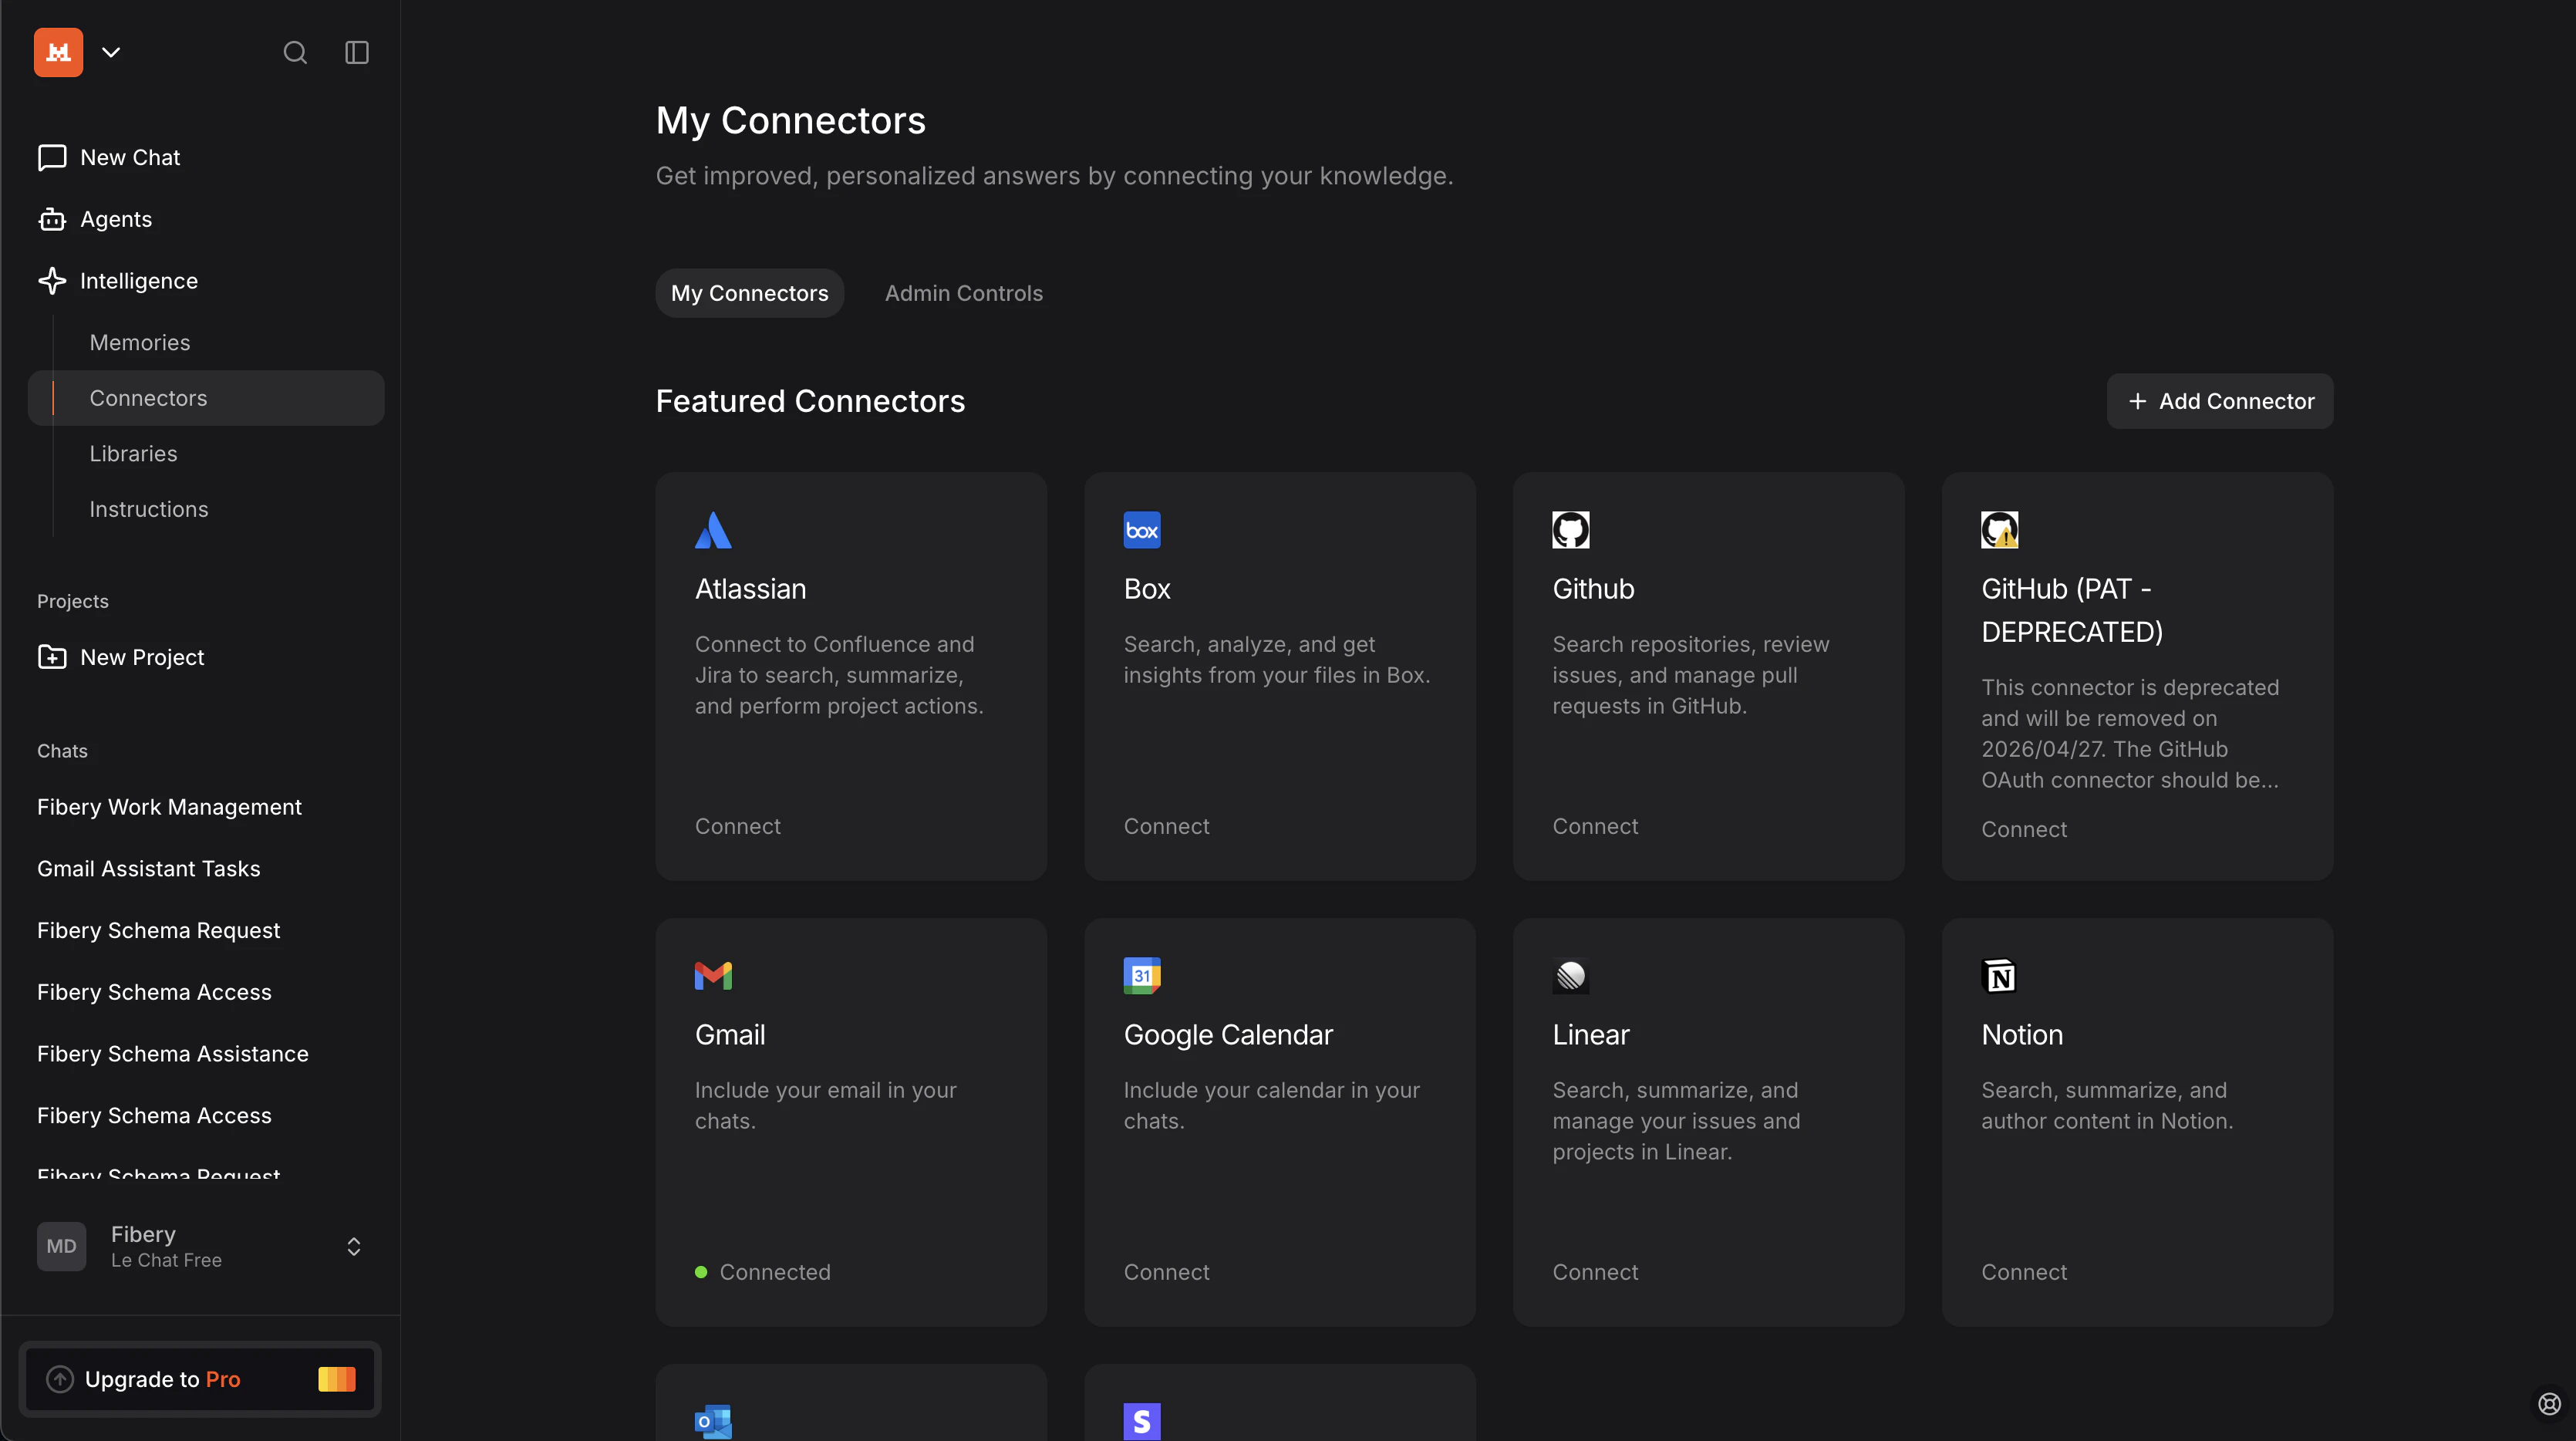 2. Click "+ Add Connector" and select "Custom MCP Connector". Add name, Connector Server and Description.
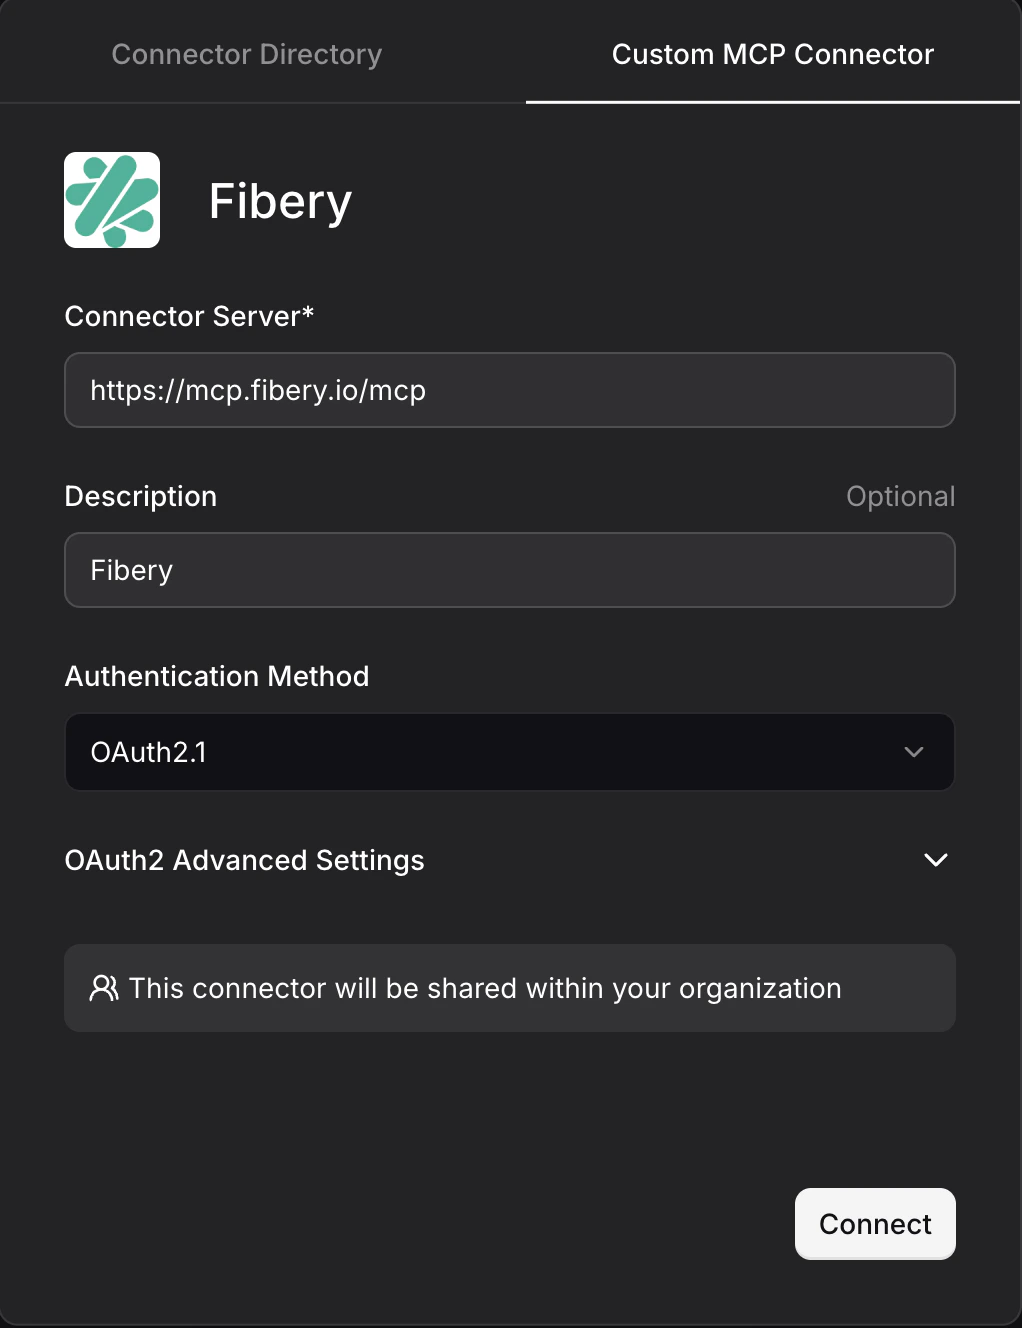 3. Complete authentication by hitting Connect.
### Claude Code
Open your terminal and run:
```bash theme={null}
claude mcp add --transport http fibery https://mcp.fibery.io/mcp
```
Then start a Claude session, enter `/mcp` and authenticate via browser.
### Codex
Run this command, then authenticate via `/mcp` when Codex is running:
```bash theme={null}
codex mcp add --url https://mcp.fibery.io/mcp Fibery
```
### OpenCode
Locate your OpenCode configuration file (usually under `~/.config/opencode/opencode.json`) and add the following configuration:
```json theme={null}
{
"mcp": {
"fibery": {
"type": "local",
"command": ["npx", "-y", "mcp-remote", "https://mcp.fibery.io/mcp", "--transport", "http-only"],
"timeout": 60000
}
}
}
```
Then run `opencode mcp list` to authorize.
### AugmentCode
Run this command, then authenticate via `/mcp` when Auggie is running:
```bash theme={null}
auggie mcp add --command npx --args "-y mcp-remote https://mcp.fibery.io/mcp" Fibery
```
### Cursor IDE
Locate your MCP client configuration file (usually `.cursor/mcp.json`) and add the following configuration:
```json theme={null}
{
"mcpServers": {
"Fibery": {
"url": "https://mcp.fibery.io/mcp"
}
}
}
```
After adding the connector, Cursor will ask you to log in to your Fibery workspace using OAuth 2.0.
### Windsurf IDE
Open the settings menu (hidden in "..." on the top right), click the settings button on the last line in front of "MCP".
3. Complete authentication by hitting Connect.
### Claude Code
Open your terminal and run:
```bash theme={null}
claude mcp add --transport http fibery https://mcp.fibery.io/mcp
```
Then start a Claude session, enter `/mcp` and authenticate via browser.
### Codex
Run this command, then authenticate via `/mcp` when Codex is running:
```bash theme={null}
codex mcp add --url https://mcp.fibery.io/mcp Fibery
```
### OpenCode
Locate your OpenCode configuration file (usually under `~/.config/opencode/opencode.json`) and add the following configuration:
```json theme={null}
{
"mcp": {
"fibery": {
"type": "local",
"command": ["npx", "-y", "mcp-remote", "https://mcp.fibery.io/mcp", "--transport", "http-only"],
"timeout": 60000
}
}
}
```
Then run `opencode mcp list` to authorize.
### AugmentCode
Run this command, then authenticate via `/mcp` when Auggie is running:
```bash theme={null}
auggie mcp add --command npx --args "-y mcp-remote https://mcp.fibery.io/mcp" Fibery
```
### Cursor IDE
Locate your MCP client configuration file (usually `.cursor/mcp.json`) and add the following configuration:
```json theme={null}
{
"mcpServers": {
"Fibery": {
"url": "https://mcp.fibery.io/mcp"
}
}
}
```
After adding the connector, Cursor will ask you to log in to your Fibery workspace using OAuth 2.0.
### Windsurf IDE
Open the settings menu (hidden in "..." on the top right), click the settings button on the last line in front of "MCP".
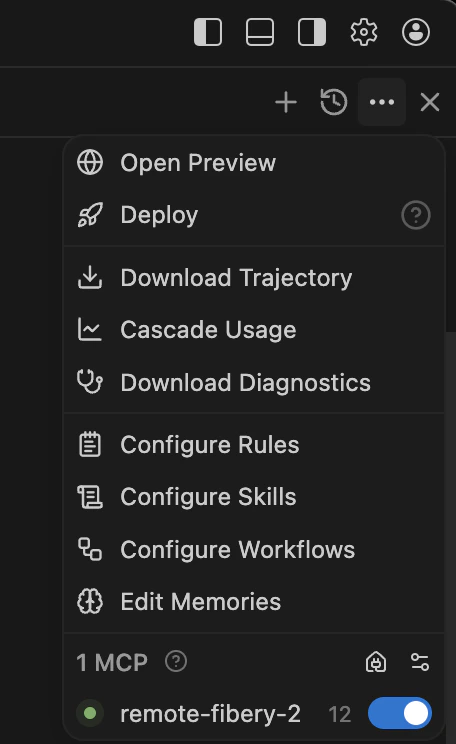 Then use this config in `mcp_config.json`:
```json theme={null}
{
"mcpServers": {
"fibery": {
"serverUrl": "https://mcp.fibery.io/mcp"
}
}
}
```
### VS Code (GitHub Copilot)
Locate your MCP client configuration or find the option "MCP: Add Server" via Cmd+Shift+P, then add the following configuration to your `mcp.json`:
```json theme={null}
{
"servers": {
"Fibery": {
"url": "https://mcp.fibery.io/mcp",
"type": "http"
}
},
"inputs": []
}
```
### Zed IDE
1. Open Agent Panel on the right.
2. In the menu hidden in "...", click on "Add Custom Server".
Then use this config in `mcp_config.json`:
```json theme={null}
{
"mcpServers": {
"fibery": {
"serverUrl": "https://mcp.fibery.io/mcp"
}
}
}
```
### VS Code (GitHub Copilot)
Locate your MCP client configuration or find the option "MCP: Add Server" via Cmd+Shift+P, then add the following configuration to your `mcp.json`:
```json theme={null}
{
"servers": {
"Fibery": {
"url": "https://mcp.fibery.io/mcp",
"type": "http"
}
},
"inputs": []
}
```
### Zed IDE
1. Open Agent Panel on the right.
2. In the menu hidden in "...", click on "Add Custom Server".
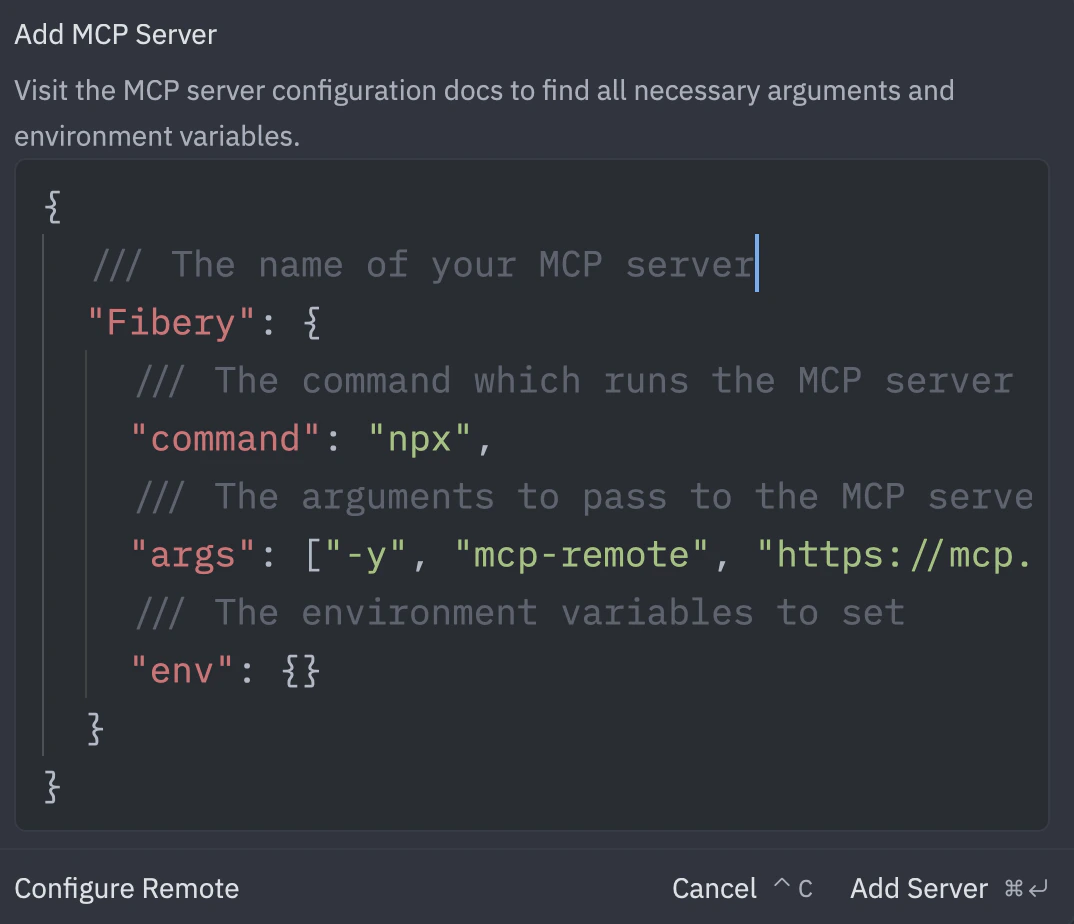
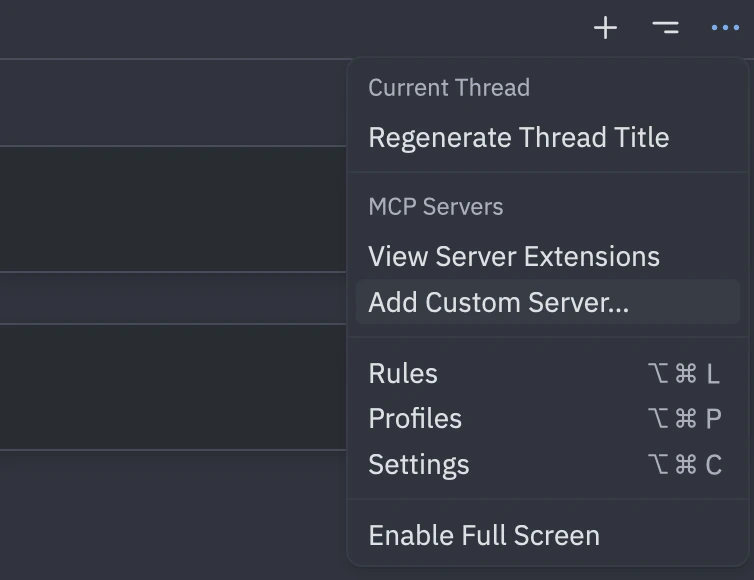 3. Use this configuration:
```json theme={null}
{
"Fibery": {
"command": "npx",
"args": ["-y", "mcp-remote", "https://mcp.fibery.io/mcp", "--transport", "http-only"],
"env": {}
}
}
```
4. Authenticate using "Add Server".
3. Use this configuration:
```json theme={null}
{
"Fibery": {
"command": "npx",
"args": ["-y", "mcp-remote", "https://mcp.fibery.io/mcp", "--transport", "http-only"],
"env": {}
}
}
```
4. Authenticate using "Add Server".
 ### n8n
1. Select the MCP Client node and configure it with the Fibery MCP Server URL: `https://mcp.fibery.io/mcp`
### n8n
1. Select the MCP Client node and configure it with the Fibery MCP Server URL: `https://mcp.fibery.io/mcp`
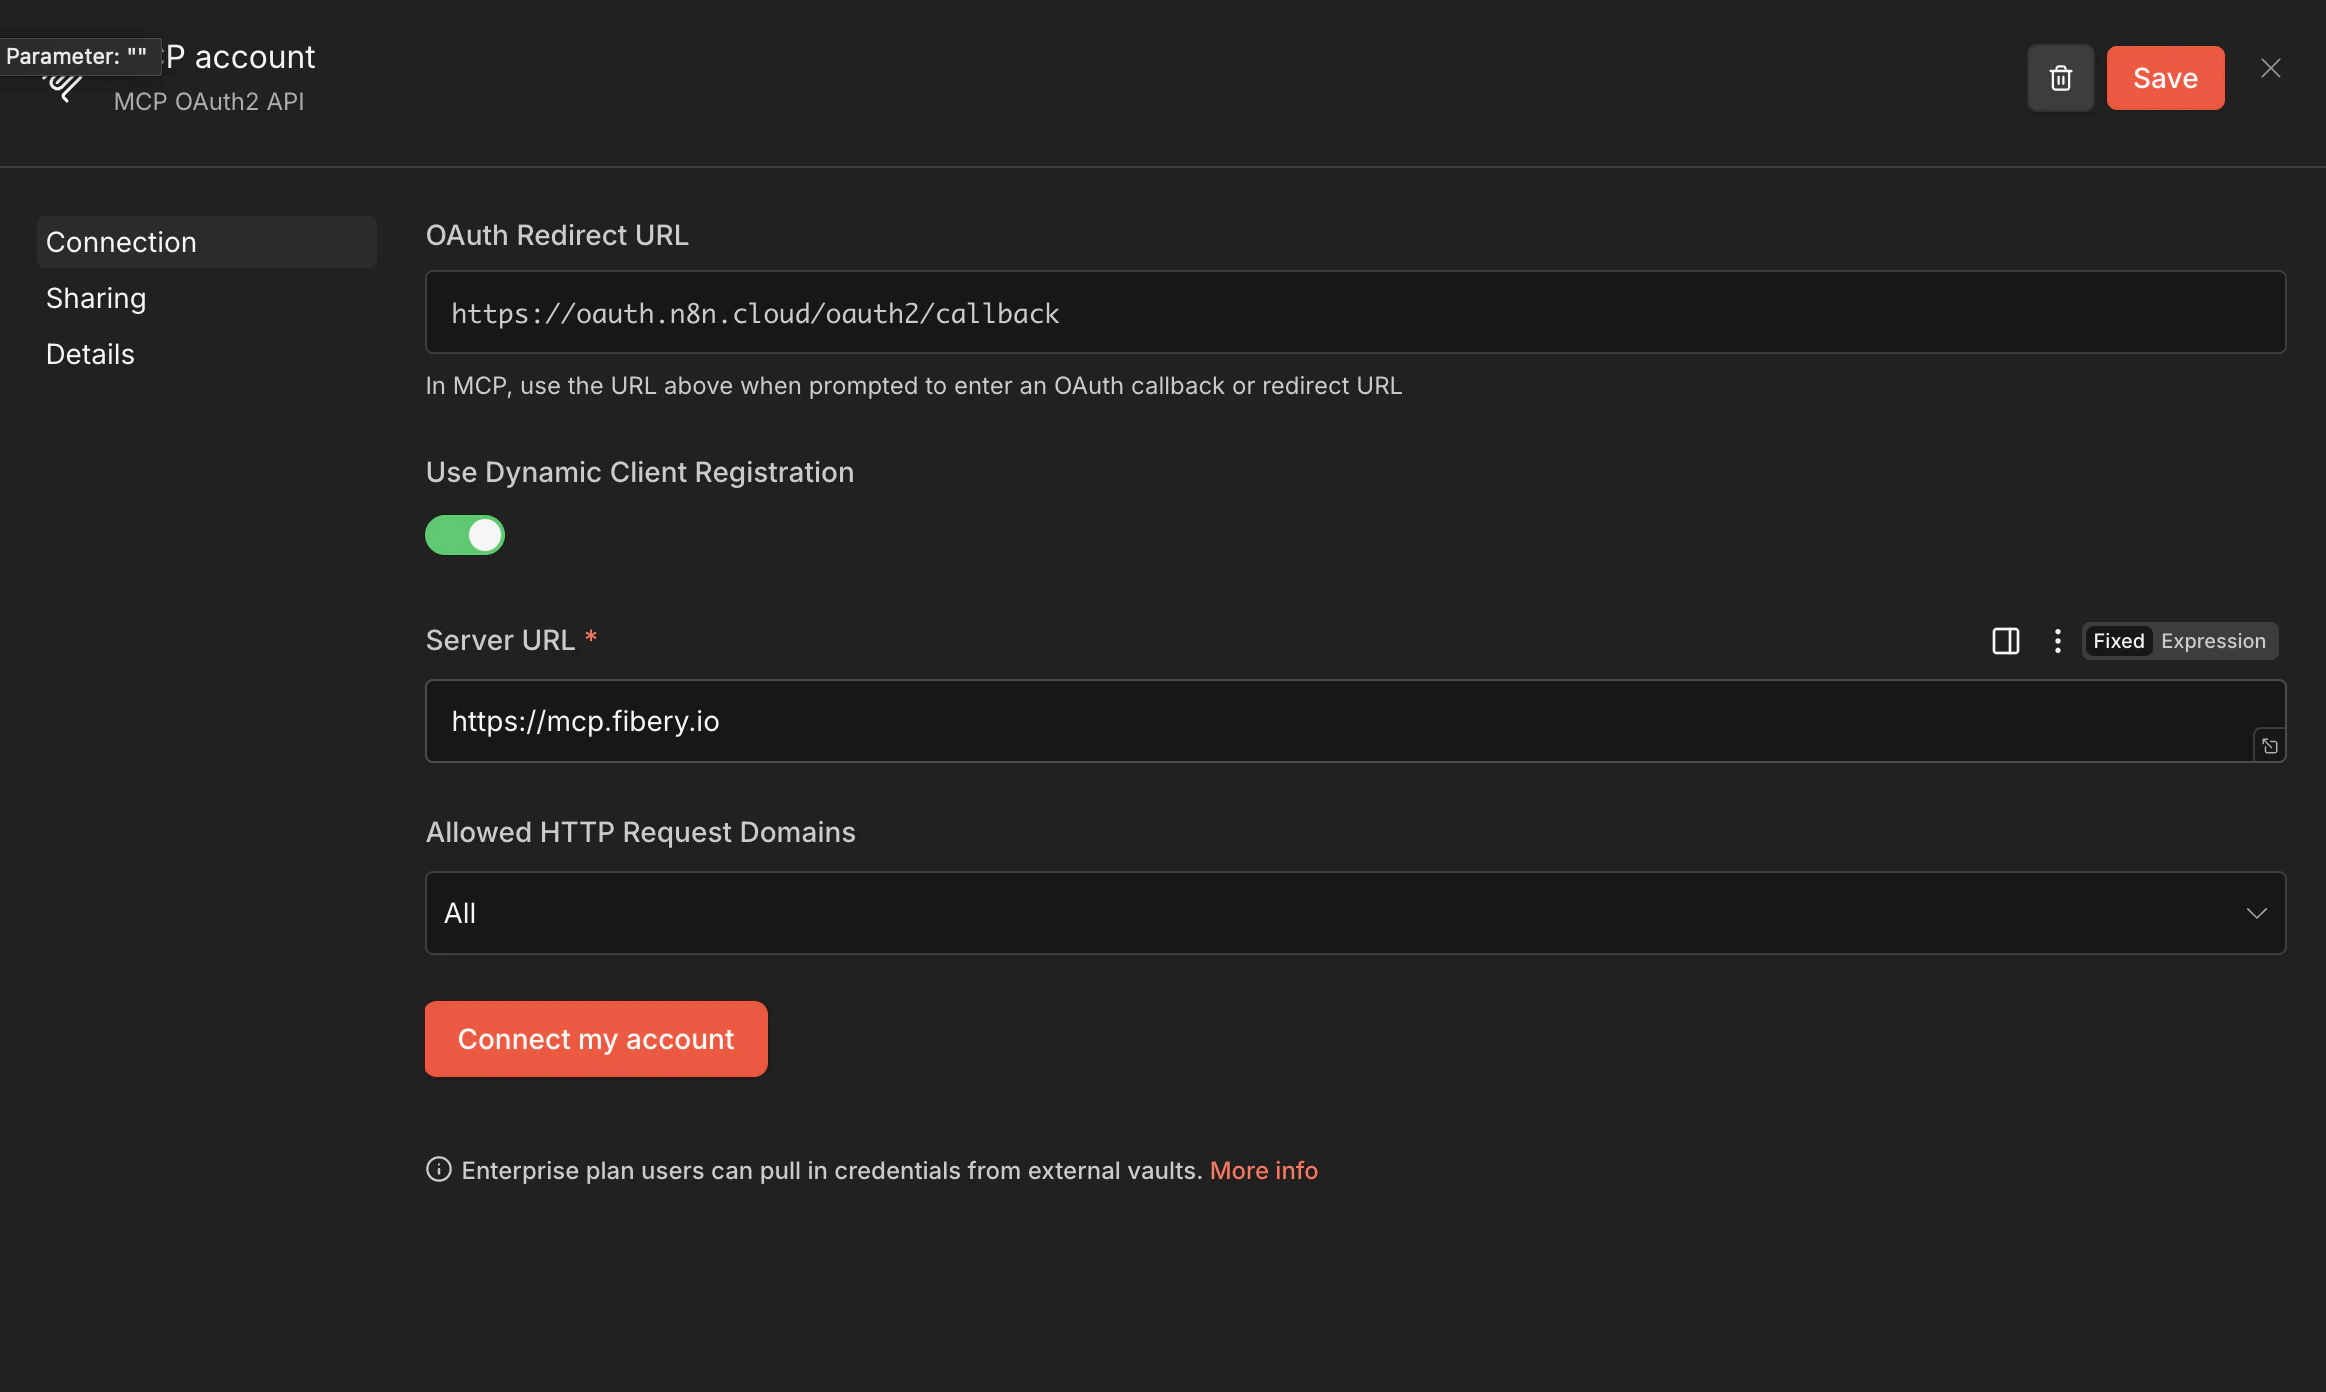
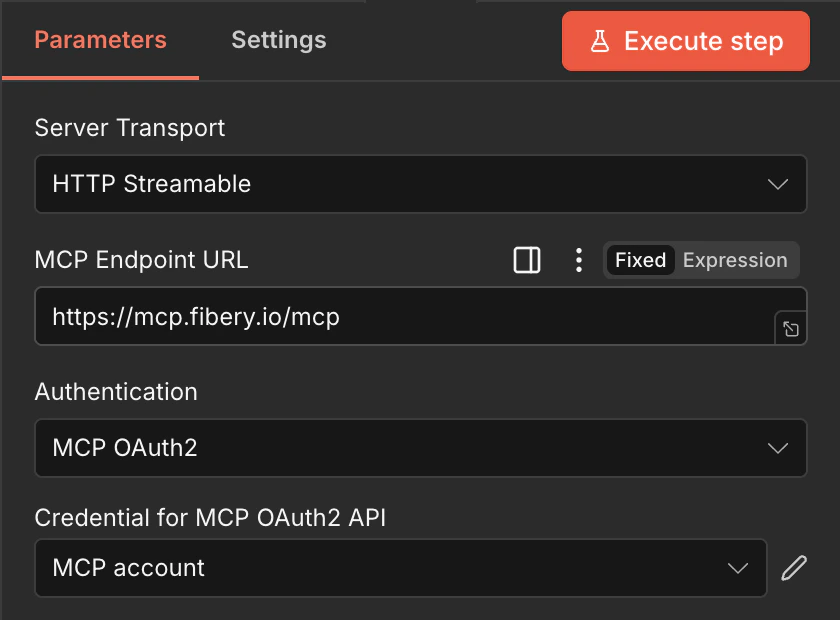 2. Click on Edit for "Credential for MCP OAuth2 API", fill out the details, and connect your account.
 ### Make.com
1. Create a new connection
2. From the MCP Server dropdown, select "New MCP Server"
3. Enter `https://mcp.fibery.io/mcp` in the URL field (leave "API Key / Access token" field empty)
4. Save and complete the authentication process.
### Make.com
1. Create a new connection
2. From the MCP Server dropdown, select "New MCP Server"
3. Enter `https://mcp.fibery.io/mcp` in the URL field (leave "API Key / Access token" field empty)
4. Save and complete the authentication process.